If you’re an artist, you’ve probably heard of colored pencils. They’re so versatile, portable, and full of color that you can use them for anything from a quick sketch to a masterpiece. However, even the most seasoned artists can work hard to blend and achieve that seamless transition of colors. That’s where the Colored Pencil Blender by Drawn on Portraits comes into play.
In this blog, we’ll explore the world of color pencil blending and show this excellent tool can help you take your art to the next level. The fantastic thing about colored pencil blending is that it doesn’t just look great on paper. It’s also easy to use, and it’ll help you achieve that smooth transition of colors that you’re looking for. Here’s everything you need to know about colored pencil blending.
Styling Can be Very Expressive with Colored Pencil Blender
The Artistry of Colored Blending Pencil
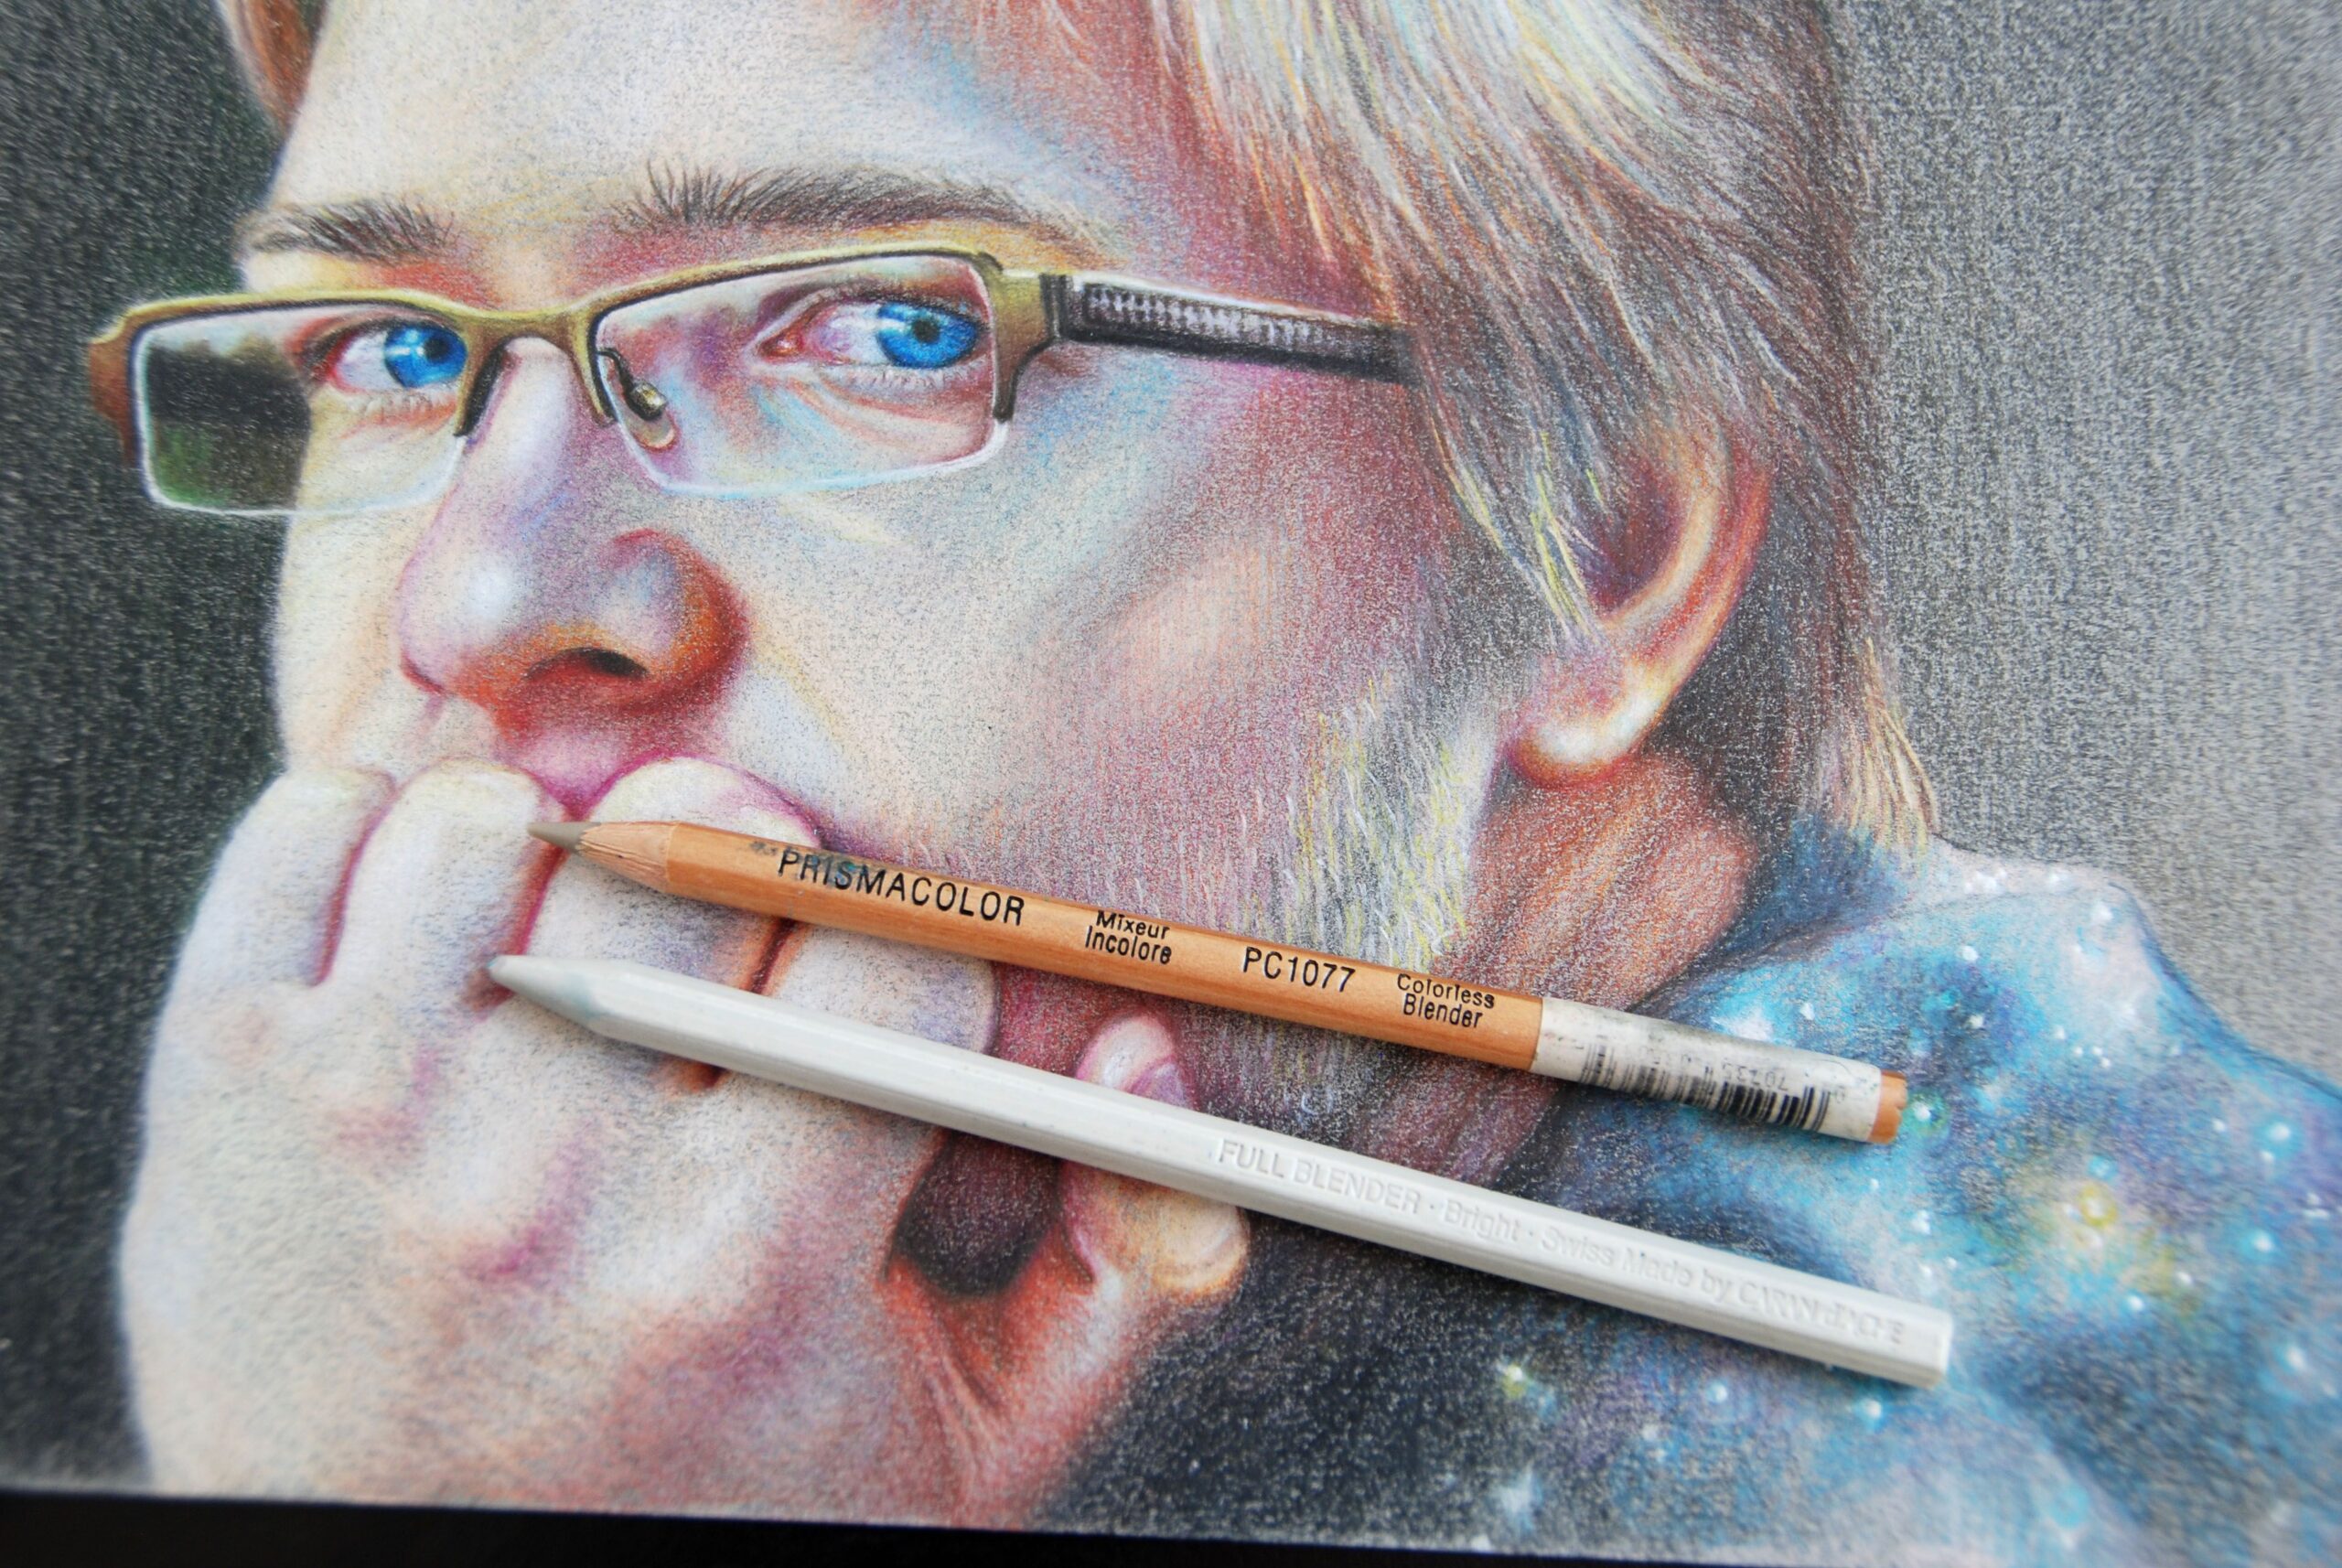
Colored Blending Pencil is a specialized tool designed to blend and soften the colors of your colored pencil drawings. They come in various forms, including pencils, markers, and technical paper. Colored blenders are essential because they allow you to create smooth gradients, bright colors, and professional-looking artwork, creating a more realistic look and feel in the illustrations.
Types of Blending Colored Pencil
Firstly, we have Blender pencils that look like regular colored pencils but contain no pigment. They work by smoothing and blending existing colored pencil layers without adding any color. Secondly, colorless Blender Markers are alcohol-based markers with a dual tip. One end is a fine tip for detailed work, while the other is a broad tip for larger areas. They dissolve and blend colored pencil pigments. Lastly, there are solvent-based Blenders. Solvents like odorless mineral spirits or specialized colored pencil solvents can be used with brushes or stumps to dissolve and blend colored pencil pigments. These solvents are particularly effective with wax-based colored pencils.
How to Use Pencil Blenders
A pencil blender is a great way to add a unique look to your artwork. You can layer and blend your strokes to give them a velvety finish. You can also create unique textures like fur or water ripples from this. It can lighten and darken the colors by lifting the pigment or using the Blender to apply more pressure. Overall, it’s a great way to make your artwork look more realistic.
Specialized Paper for Blending
The quality of the paper used is critical in successfully blending colored pencils with blenders. Generally, a medium-sized piece is chosen for mixing due to its ability to provide sufficient grip for the pigment to stick to the surface without causing too much of an abrasive effect. Bristol board is an ideal choice for colored pencil artists due to its smooth texture and the ability to absorb multiple layers of color. Additionally, some brands offer specialized blending papers designed to work with blenders, often with a distinct surface texture that facilitates blending.
Seamless Blending
The most significant advantage of using the Colored Blender is its ability to achieve seamless blending. It erases the grainy appearance that often plagues colored pencil artwork, making your colors flow seamlessly into each other. This is especially important for creating realistic skin tones, soft gradients in landscapes, or vibrant, smooth backgrounds.
Precision Control
The Pencil Blender allows for precise control over the blending process. Unlike traditional blending tools like fingertips or tissue, the Blender lets you target specific areas and control the blending intensity. This level of precision is invaluable for artists who want to maintain sharp details while achieving beautiful transitions between colors.
Layering Made Easy
Layering is a fundamental technique in colored pencil art, enabling artists to build up colors and achieve depth and dimension. The Colored Pencil Blender enhances the layering process by ensuring that each layer seamlessly integrates with the previous one. The result is more realistic and more eye-catching. The result is more natural and more eye-catching.
Tips and Techniques for Mastery
Experiment with different colors to give your artwork depth and dimension. Start with light pressure for the first layer and work up to more pressure as you add more colors. Try blending styles like round, linear, and crosshatching to get different textures and looks. Practice makes perfect – to master blending in colored pencils, you’ll need to practice a lot. Make a mixing swatch chart to know how different colors work together and how to use other blending techniques.
Maintenance and Care
If you’re using markers or brushes with solvent-based blenders, cleaning them regularly is essential to prevent pigment buildup and contamination. Store your pencil blenders in a cool, dry place away from direct sunlight to prolong their shelf life.
Choosing the Right Pencil Blender for You
When selecting a blender for your artwork, it is essential to consider your preferred medium. Depending on your style and preferences, wax-based pencils are more suitable for a solvent-based blender. Conversely, Oil-based pencils may be more ideal for a blender. Ultimately, it is up to you to decide which type of Blender is best for you, as some artists may prefer the control of a blender pencil, while others may opt for a more versatile marker or solvent.
Why Choose Drawn on Portraits?
When selecting a color pencil blender, considering the product’s quality is essential. With Drawn on Portraits’ reputation for excellence, customers can trust that their Blender meets the highest quality standards. Additionally, customers can rely on the company’s commitment to customer satisfaction, with a dedicated customer support team available to answer any questions or concerns. Finally, affordability is crucial in selecting a blender, as it allows artists of all budgets to access quality tools at an affordable price. Finally, joining the Drawn-on Portraits community is a great way to connect with fellow creatives and share your work.
Testimonials and Success Stories
Let’s hear from artists who have experienced the transformative power of the Pencil Blender:
Sarah, a Professional Portrait Artist
“I’ve been using colored pencils in my portrait work for years, but achieving smooth skin tones was a real challenge. The Colored Blender changed everything for me. Now, I can create lifelike, flawless skin textures that captivate my clients.”
Michael, an Aspiring Illustrator
“As a beginner, I struggled to blend colors and make my drawings look polished. The Coloring Pencil Blender helped me bridge the gap between my imagination and artwork. It’s a secret weapon for taking my drawings to the next level.”
Emily, a Nature Enthusiast
“I love drawing landscapes and wildlife scenes, and the Pencil Blender has made a world of difference in my work. It’s allowed me to achieve those soft, dreamy backgrounds that make my subjects pop.”
Conclusion
In conclusion, if you want to upgrade your colored pencil art and free your inner artistic potential, the Drawn on Portraits Pencil Blender is your perfect companion. This tool is highly adaptable, efficient, and easy to use and will assist you in achieving high-quality results in your work. Say goodbye to harsh lines and hello to seamless blending!
Invest in your artistry today with the Drawn on Portraits Colored Pencil Blender, and watch your colored pencil creations come to life like never before. Join our community of passionate artists and take your art to new heights. Start your creative journey and make it extraordinary with Drawn on Portraits!